Abstract
Prisoft has decades of experience in implementing on premise data warehouse solutions around Oracle, Teradata and Microsoft SQL Server technology stack. On our legacy projects we had mainly used Oracle Answers, PowerBI, Tableau and Qlik as the visualization tools. In the evolution process from Oracle to Teradata we are now witnessing a third wave of innovation in data warehousing technology with the advent of cloud data warehouses. As enterprises move to the cloud, they are abandoning their legacy on premise data warehousing technologies, including Hadoop, for these new cloud data platforms. This transformation is a huge tectonic shift in data management and has profound implications for enterprises.
From our consulting experience we developed a product, Healthcare Analytics Framework on SQL Server and Oracle DB with Tableau and PowerBI as the visualization tool of choice. The purpose of this blog is to migrate Healthcare Analytics Framework to AWS Cloud using AWS CloudFormation templates to launch, configure, and run the AWS compute, network, storage, and other services required to deploy a specific workload on AWS. Specifically, this Quick Start deploys Tableau Server in an environment that can help organizations with workloads that fall within the scope of the U.S. Health Insurance Portability and Accountability Act (HIPAA).
Architectural Diagram
Description
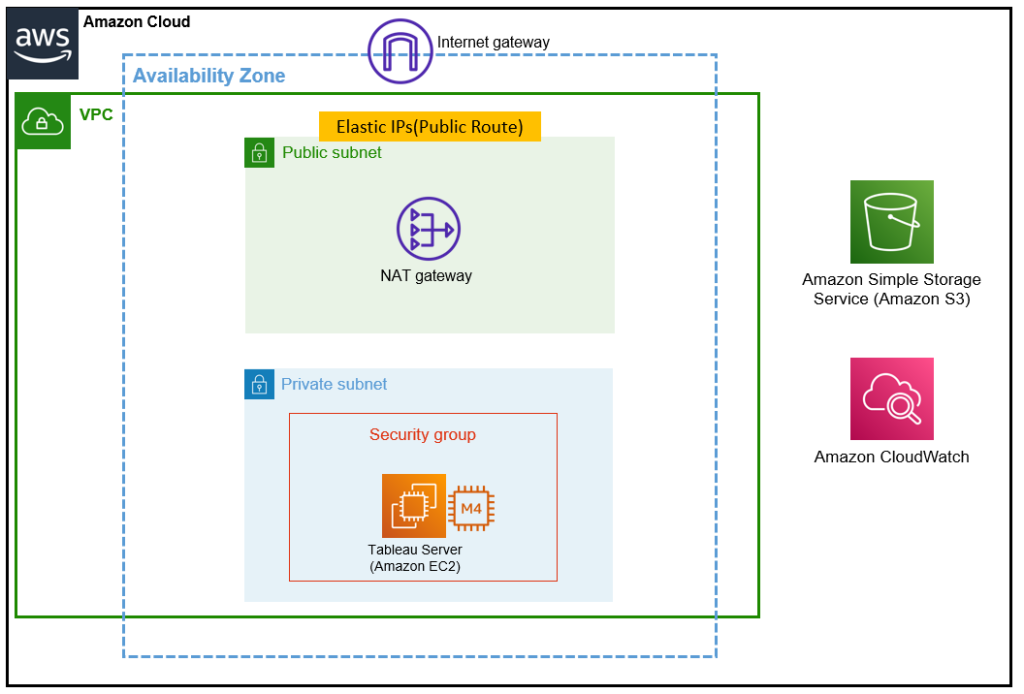
A VPC is provisioned with public and private subnets in the AWS cloud. An internet gateway to provide access to the internet. In the public subnets, managed NAT gateways to allow outbound internet access for resources in private subnets. Security group is attached to EC2 defining inbound and outbound rules. CloudWatch metrics’ is used to monitor the resources.
Healthcare Database in AWS Redshift
The Healthcare Database was migrated from Oracle to AWS Redshift using a third-party tool Matillion on AWS. This HCD database in AWS Redshift is used as a data source for the Tableau Dashboards.

Here is the schema browser for the loaded HCD database.

Setting-Up EC2 instance for Tableau Server Deployment
The Quick Start sets up the following:
- A VPC configured with public and private subnets according to AWS best practices.
- An internet gateway to provide access to the internet
- In the public subnets, managed NAT gateways to allow outbound internet access for resources in private subnets.
- In the public subnets, a bastion host in an Auto Scaling group to allow remote access to the VPC.*
- An Application Load Balancer to route traffic to Tableau Server over HTTPS.
1. Create an EC2 instance
- We are using CentOS operating system and got them form CentOS AMI in AWS Marketplace .
- Choose an instance type as 4xlarge for better performance. Other EC2 type Details
- Select your existing VPC or Create new one.
- Set EBS Storage Capacity to at least 25 GiB.
- Add inbound rules to the security group as follows:

- Review and Launch instance.
2. Connect (SSH) to your instance using Putty.
- You would have downloaded a pem-key after launch of EC2 instance.
- First, we have to generate a ppk (putty private key) from pem-key. Open Putty key generator. Load the pem file and after successful import save the private key.

- Now open Putty. Add hostname as centos@
- Go to Connection>SSH>Auth and Browse to the PPK-key generated previously.
- Save the connection and click on Open.
- If there is connection issue, verify your inbound rules in security groups.


3. Connect to GUI on Amazon EC2 using tiger-vnc.
The steps detailed in Tableau Server on Linux: Everybody’s Install Guide was used to install the Tableau Server
A. Install Desktop package and install TigerVNC.
- Make Sure the Desktop Packages are installed. If not the run : yum groupinstall “GNOME Desktop”
- Install TigerVNC server packages:
sudo yum install tigervnc-server
- Configure a VNC-specific password containing 6 to 8 characters for this user. When asked if you want to enter a view-only password, press “n”.
vncpasswd
- Start the VNC Server on display number 1. Enter the following command to start the VNC Server only once: Note: Entering this command prevents the service from coming up after a reboot.
vncserver :1 -geometry 1920×1080 -depth 24
- Enter the following commands to always start the VNC Server at boot time: Create a new systemd unit.
sudo cp /lib/systemd/system/vncserver@.service/etc/systemd/system/vncserver@.service
- Use the sed command to replace all occurrences of USER in the new unit with ec2-user.
sudo sed -i ‘s/<USER>/centos/’ /etc/systemd/system/vncserver@.service
- Reload the systemd manager configuration.
sudo systemctl daemon-reload
- Enable the service.
sudo systemctl enable vncserver@:1
- Start the service.
sudo systemctl start vncserver@:1
B. Connect to GUI using VNC Client.
- Install the TigerVNC software on your local computer.
- On your local computer, use SSH to connect to your instance while creating a tunnel to forward all traffic on local port 5901/TCP (VNC) to the instance’s VNC server: Connect to your instance using SSH.
- Use the -L parameter to enable port forwarding. Replace PEM_FILE with the path for your private key. Replace INSTANCE_IP with your instance’s public or private IP, as appropriate.
- Use PowerShell on windows for SSH.
ssh -L 5901:localhost:5901 -i PEM_FILE ec2-user@INSTANCE_IP

- Open the VNC Client on your local computer. When asked for the VNC server hostname, enter localhost:1 and then connect to it. Enter password set previously by you using vncpasswd.

Installing tableau server on EC2 instance.
1. Login to EC2 using GUI on TigerVNC.
2. Go to the link and download the following file:

3. Go to download folder and open a terminal and install the package as following:

4. Navigate to the scripts directory: cd/opt/tableau/tableau_server/packages/scripts.
5. If the Tableau Server that you are installing can access the internet directly, run the following script:sudo ./initialize-tsm –accepteula
6. If your organization uses a forward proxy solution to access the internet, then you will need to configure Tableau Server to use the proxy. In this case, you will need to find out what the host name or IP address of the proxy server is and the HTTP port that the port uses. In most cases, the HTTP port will be 80. And in all cases, the HTTPS (SSL) port must be 443.You must include the –http_proxy and/or –https_proxy flags to specify the forward proxy server.
7. After you determine the host name or IP address of the proxy server, configure Tableau Server to use the proxy by running the following initialization script:
sudo ./initialize-tsm –accepteula –http_proxy=http://proxy.example.lan:80/ –https_proxy=http://1.2.3.4:443/
In this example, proxy.example.lan and 1.2.3.4 are the example host name and IP address respectively. You’ll need to replace one or both of those before you run the script. Also, take care to use http when you specify the URL for the https proxy environmental variable. Do not specify the https protocol for the value of the https proxy environmental variable.
8. After initialization is complete, close the terminal session: logout
9. Activate and register Tableau Server.
10. Sign in to Tableau Services Manager Web UI :
- https://prisoft.com:8850/ (if you’re working directly on the server computer)
- https://<server ip> or <server name> :8850/ (if you know the server’s IP address or server name)
- In the sign-in page that appears, enter your administrator user name and password.

What if you can’t log in?
- If you get an authentication error, verify that the user account is in the tsmadmin group.
- To view the user accounts in the tsmadmin group, run the following command in Bash: grep tsmadmin /etc/group
- If the user account is not in the group, run the following command to add the user to the tsmadmin group: sudo usermod -G tsmadmin -a
- After you have added the user to the tsmadmin group, run the tsm login command.
- After you have successfully logged in to TSM, sign in to Tableau Services Manager Web UI(Link opens in a new window) to activate and register Tableau Server:
- Enter your Product key and proceed.
- Give your Personal Details, Company information and other details.o Select Identity Store as Local.
- Choose Default port as 80.
- After you have configured the options on this page, click Initialize. The initialization process can take a while. When initialization is complete the following page is displayed:

- Click next and Create the Tableau Server administrator account.
- To Stop firewall: use command: sudo systemctl stop firewalld
- After this try login to Tableau server using: http://<EC2ElasticPublicIP>:80
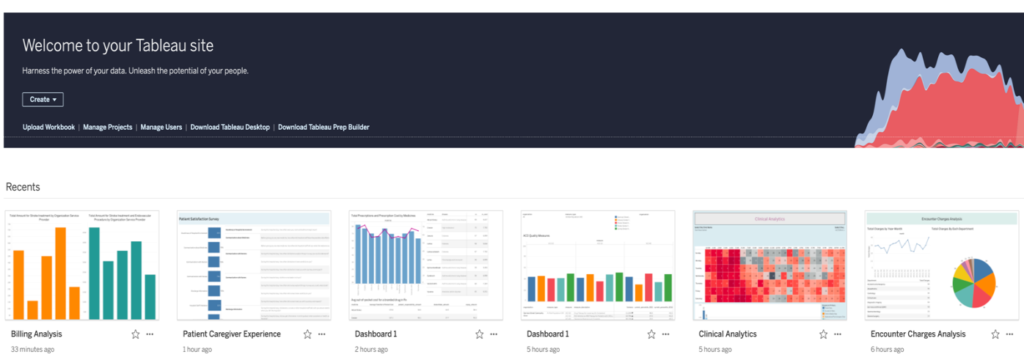
- The Healthcare Analytics Framework covers Claims Analysis, Quality, Compliance Clinical Analysis, Billing analysis and Encounter Charge Analysis Dashboards
Installation of Matillion in AWS
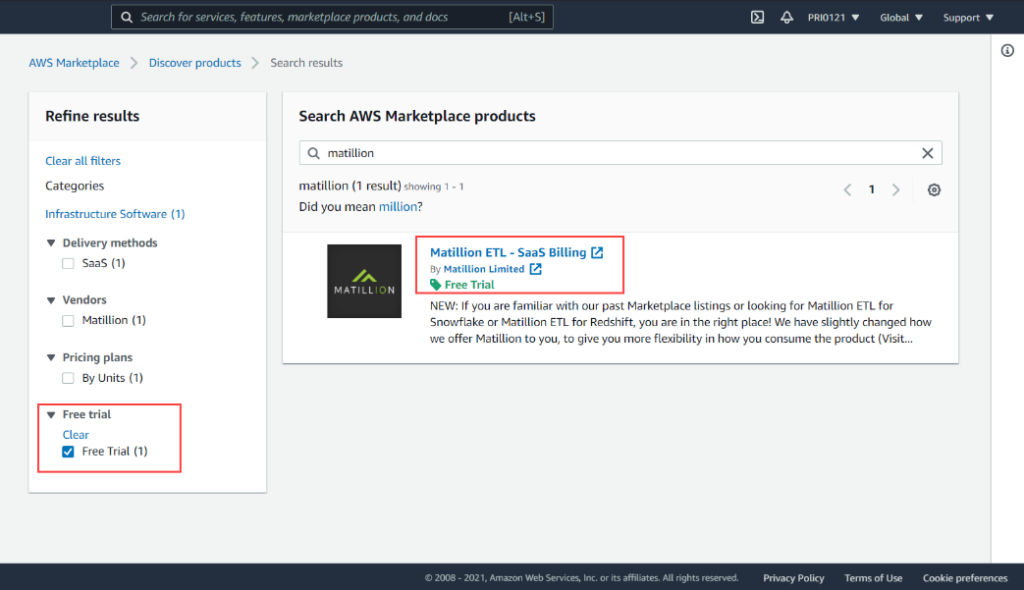
- Go to AWS marketplace and search for Matillion ETL. Choose Free trial if you need to try it first. Free trial comes for 14 day from Matillion but the AWS instance will be billed as per your provisioned EC2 instance.
- Read product overview marked, and continue to subscribe
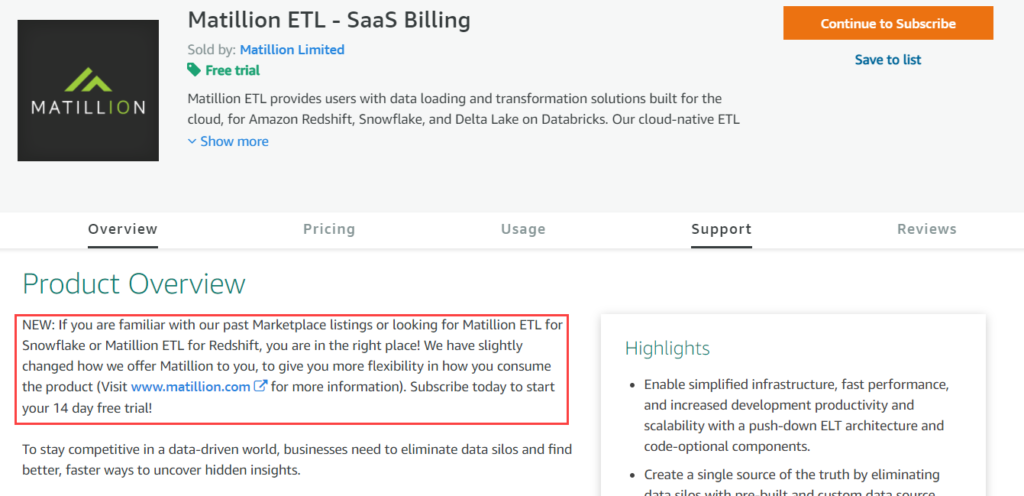
- Click on subscribe.
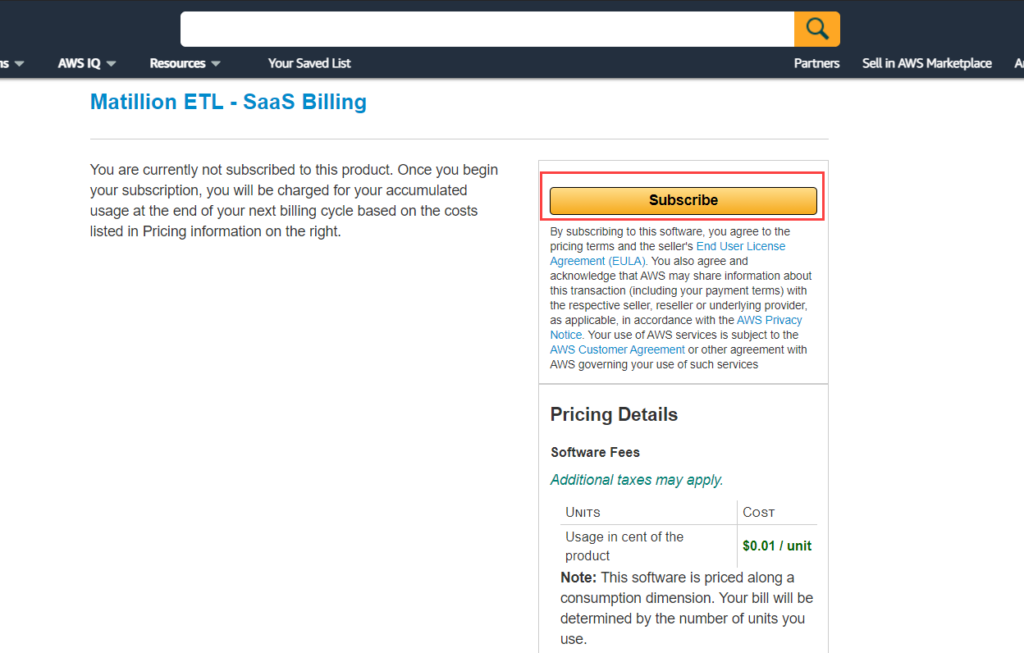
- Select Launch through EC2, then click on Launch. Through this you can launch Matillion EC2 instance like a normal EC2 launch giving you all necessary modification to configurations.

- Select Instance type as t2.medium (not free tier).

- After configuring all other settings. Review your instance and then Launch instance.
- Go to AWS Marketplace Subscriptions, click on Manage Subscription. You can access your Matillion from here. Your username is ec2-user and password will be sent to registered email.

Migration from On-premises SQL Server to Redshift using Matillion
1. Create a new project in Matillion and fill up all project Details.

2. Matillion will ask for all the details of your Redshift Cluster endpoint Connection. Just Fill up correct cluster in which we want to migrate our data.

3. Mention your Database and Default Schema and Bucket of Amazon Redshift.

4. Add New Orchestration job under newly created Project and name it.

5. Switch to newly created orchestration job and You will find a Start tab on the page. Drag a Database Query into it and connect to it. Fill up all Source and Target data.

6. Run the Job. Run on component.

7. You will find successfully completed tasks. Go to Sample tab and Check Data and row Count.

Conclusion
We see a big advantage in terms of cost, manageability, scalability and performance in the AWS Cloud migration from on premise solution. It offers scope for adopting a data lake based architecture with Redshift Spectrum for analytics and AI/ML extensions.
