Wondering how to connect Athena to Power BI?
Are you a Microsoft Power BI user wondering how you can leverage the same Amazon Athena serverless data analytics stack your Tableau friends use? Confused about how to connect Athena and Power BI? The great news is that Power BI and Amazon Athena do fit nicely together even if Microsoft does not have an “Amazon Athena” data source listed. How do you connect them? ODBC!
Amazon Athena is an interactive query service that makes it easy to analyze data in a data lake using standard SQL. One of the key elements of Athena is that you only pay for the queries you run. This is an attractive feature because there is no hardware to set up, manage, or maintain. You can query Athena with SQL or by using data visualization tools such as Amazon QuickSight, Microsoft Power BI, Tableau, or other third-party options.
Microsoft Power BI allows you similarly to analyze your data. Previously, creating dashboards with Microsoft Power BI and Athena required you to download all data locally on your computer. This takes time and can fail due to memory or network bandwidth constraints. You can now create Microsoft Power BI dashboards and leverage the power of Athena through our out-of-the-box connector for Power BI.
To connect Amazon Athena, Power BI requires setting up an ODBC connection. There are two main parts of the ODBC process;
1.The first step is getting the Amazon Athena drive installed and configured.
2.The second step is to select your new ODBC configuration and connecting Power BI to Athena.
Once these steps are completed, you are ready to roll!
Let’s jump into each step. This post provides step-by-step guidance on how to use the Athena connector for Power BI to query, visualize, and share data with Power BI.
Steps to connect to Amazon Athena in Power BI:
To create Microsoft Power BI dashboards using Athena as a data source, you start by designing a dashboard in Microsoft Power BI Desktop with the help of the Athena data source connector for Power BI and the Simba Athena ODBC driver. When you finish creating your dashboard, you publish it to the Microsoft Power BI Service. To see your data on Microsoft Power BI Service, you need to install the Microsoft Power BI on-premises data gateway in your AWS account—it works like a bridge between Microsoft Power BI Service and Athena. Finally, you configure Athena as a new data source in Microsoft Power BI Service.
When we connect to Power BI and use the get data option from home to connect to Athena we would get this window. 
On the Amazon Athena connection page, enter the following information.
- For DSN, enter the name of the ODBC DSN that you want to use.
- For Data Connectivity mode, choose a mode that is appropriate for your use, following these general guidelines:
- For smaller datasets, choose Import. When using Import mode, Power BI works with Athena to import the contents of the entire dataset for use in your visualizations.
- For larger datasets, choose DirectQuery. In DirectQuery mode, no data is downloaded to your workstation. While you create or interact with a visualization, Microsoft Power BI works with Athena to dynamically query the underlying data source so that you’re always viewing current data.
Here in DSN enter Simba Athena. So what is Simba Athena? Simba Athena is an ODBC driver which has been installed to connect to AWS Athena. Here we may encounter an error if we have not changed the configuration of Simba Athena. To do that we have to install ODBC driver Simba Athena. We can search online for ODBC driver download for Windows/Mac/Linux based on the Operating System you have.
Once this is done go to Windows and search for ODBC and select ODBC drivers.

Here go to System DSN and we can see the following

Here select Simba Athena and then click on the configure on the right side of the dialogue box.
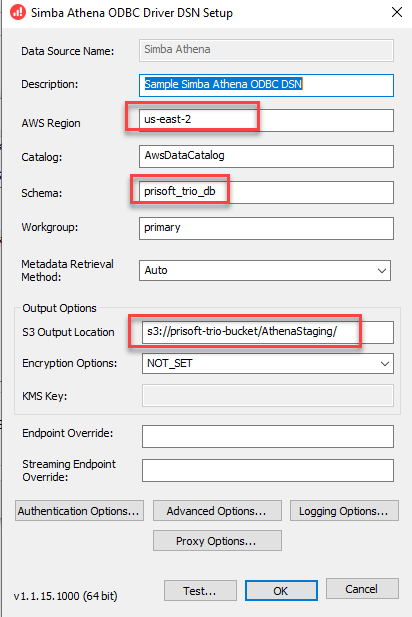
Set the three boxes in red according to your AWS account region, database, S3 location. Then go to the Advanced Options and click on it. By default the block in red would be checked but we have to uncheck it.
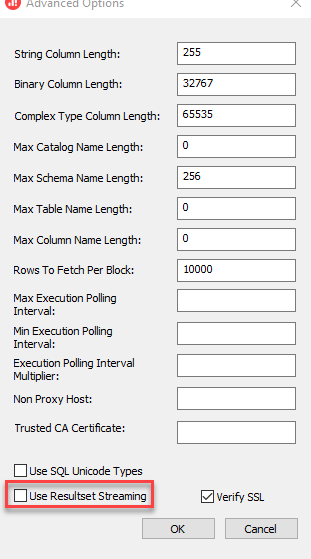
Once done click ok and then again ok on the initial settings box. And then click ok on the dialogue box of ODBC. Now if we connect to Simba Athena in Power BI we can connect to that easily. Now we can see the databases and can choose whichever data we want. 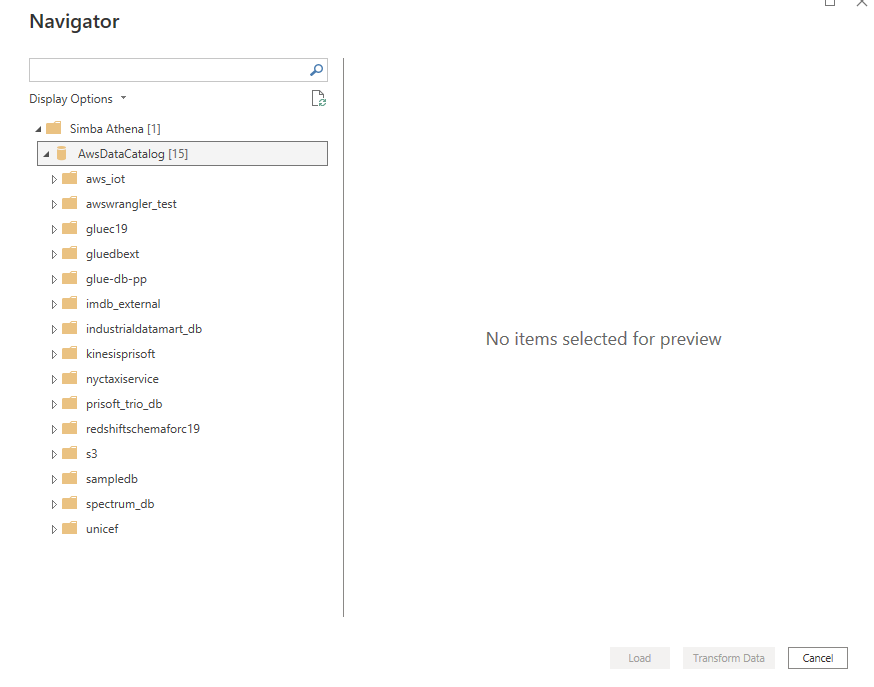
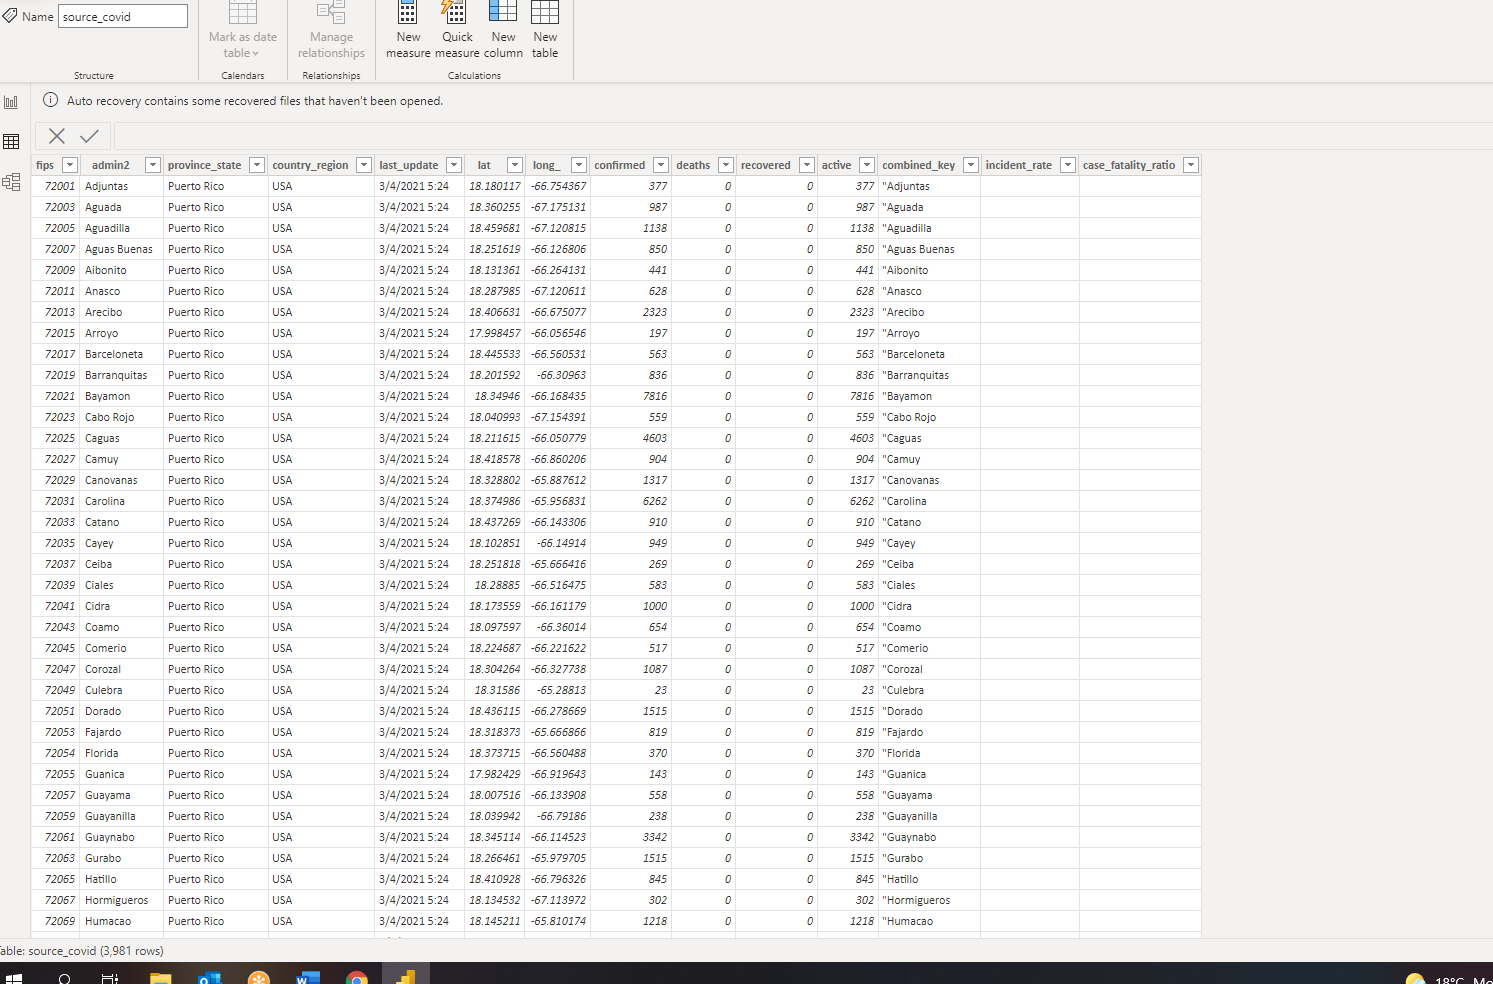
We can now connect to a table and preview the data. Accordingly we can load data and then we can start our visualization. Here’s an example of how Covid-data looks like:
We can then go on to do our visualization in Power BI.
Steps to connect to Amazon Athena in Tableau:
Let’s open tableau and connect Athena. Since I have connected earlier so it shows up automatically in my dropdown but you have to choose More and then select Amazon Athena.
. 
Now we can see this window.
We have to install a driver here. We have to download The AthenaJDBC42_2.0.27.1000.jar and put it in C:\Program Files\Tableau\Drivers. Next we can restart Tableau and go to this above window and put in the values as required.
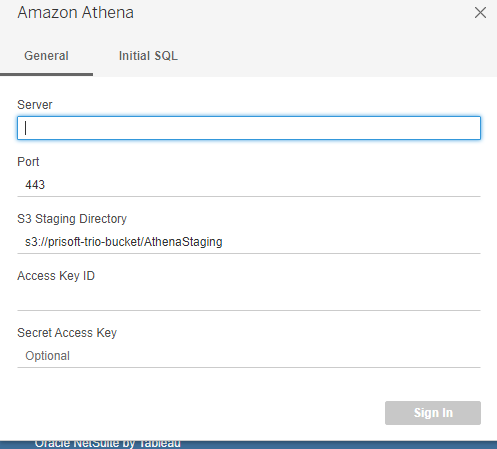
Step 1: Create a Staging Folder in the S3 bucket with Read / Write access to an IAM user.
Step 2:
- Server: athena.region.amazon.com
for example, Athena.us-east-1.amazonaws.comPort: 443 - SSL by default
- Amazon S3 Staging Directory: Find this setting in the AWS console for Amazon Athena. Enter the Staging Folder created on Step 1
- Access Key ID and Secret Access Key
At this point, Tableau sees the data like any other RDBMS. Users can perform SQL operations and provide exciting dashboards and publish them to Tableau Server.
We can then sign in and connect to Athena. Now choose the catalog and database and see the desired results. 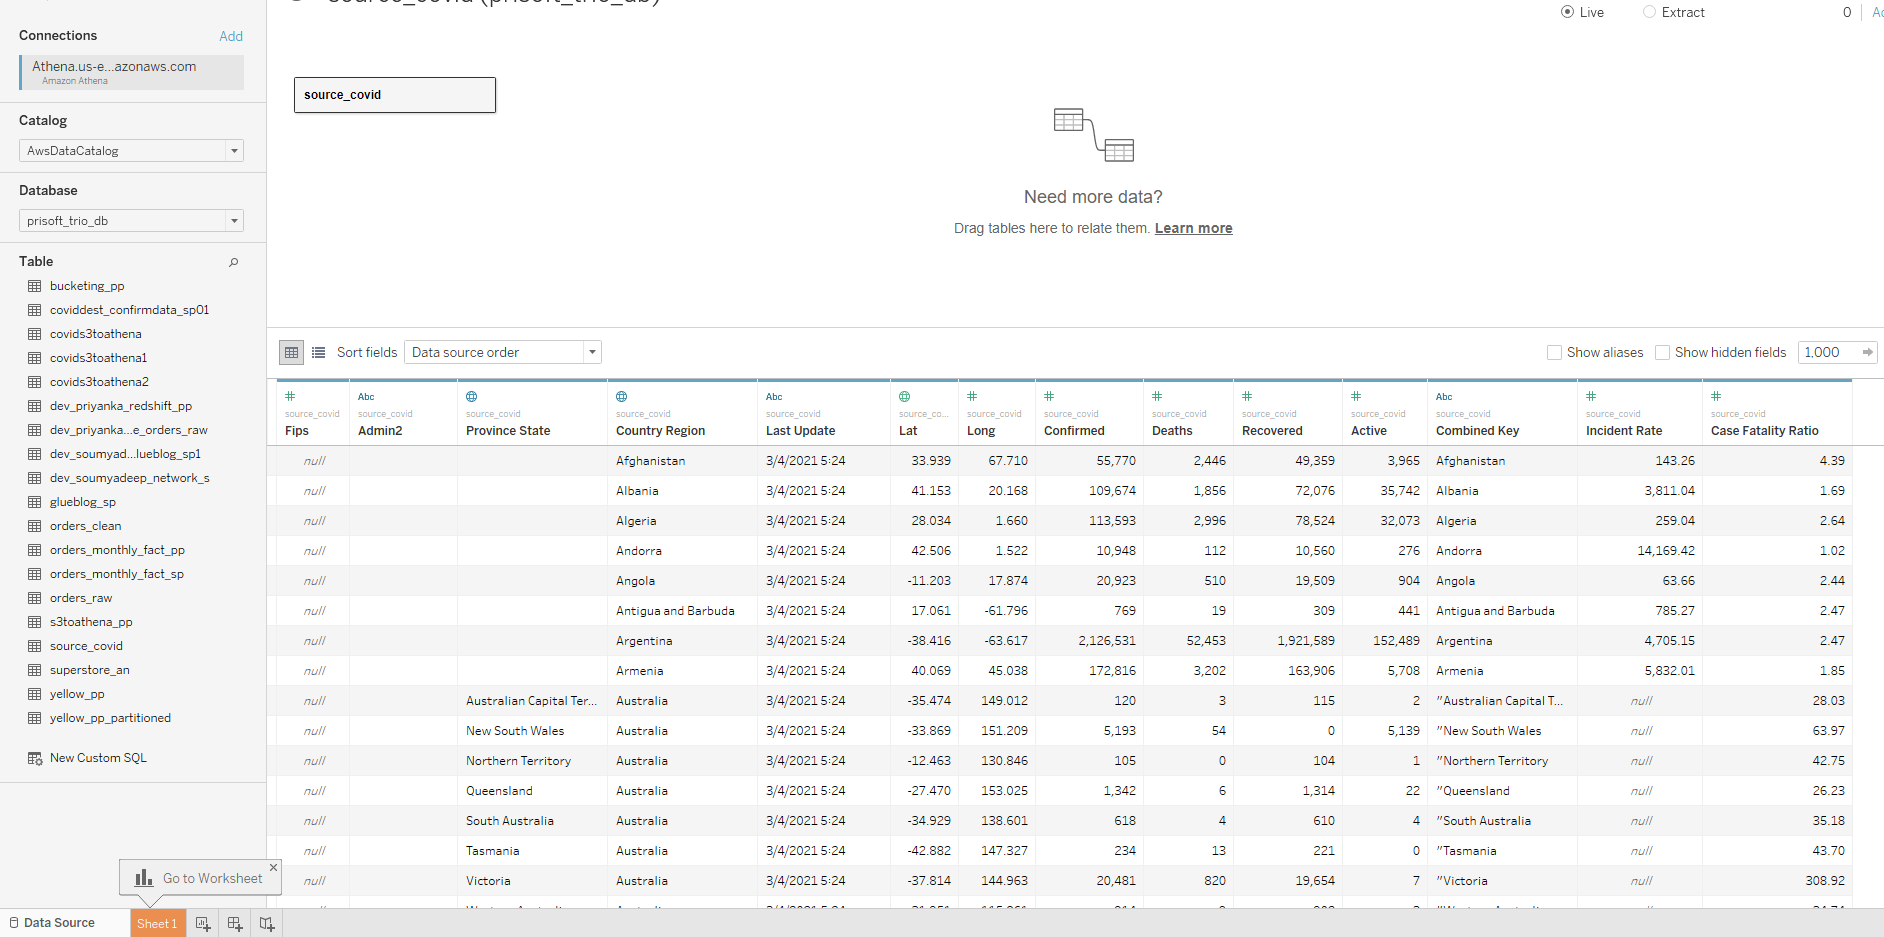
Conclusion:
Power BI and Tableau both the BI tools offer connection to AWS Athena. Both these tools use a data source connecter and drivers to connect to AWS Athena.
The only demerit here is as per AWS security policy, Access ID and Security Key must be rotated after some number of days. Standard practice is 90 days.
So when keys are rotated, authentication will fail and we have to update all the authentication errors manually which can be very tiring.